пятница, 14 октября 2016 г.

Настройка и связка Web Apps 2016 с Sharepoint 2013 по https

Устанавливаем Web Apps.

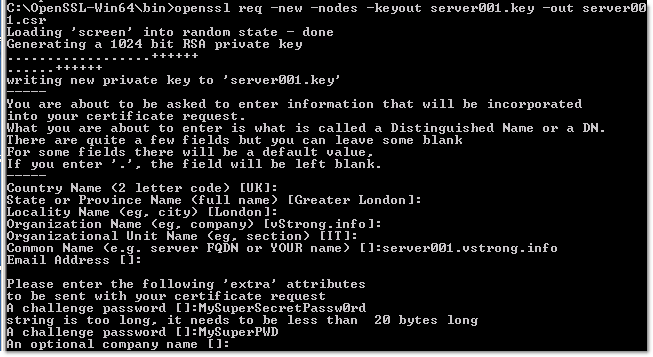
Переходим к настройке ssl.
  1. Вызываем консоль mmc.exe, где выбираем оснастку сертификатов и тип сертификатов - учётной записи компьютера
    mmc1.png
  2. Правой клавишей на Certificates - Personal, где выбрать "Все задачи - Дополнительные операции - Создать настраиваемый запрос."
    cert1.png
  3. Тип шаблона - Web Server, тип запроса - PKSC #10
    cert2.png
  4. В политике автоматической выдачи сертификатов развернуть дополнительные сведения, где нажать Properties
    cert3.png
  5. На данном этапе необходимо знать, под какими именами OWAS будет опубликован в корпоративную сеть и в Интернет. Создать в Subject Name поле Common Name с Value = FQDN сервера - это важно! и нажать Add.
    В Alternative Name создать поле DNS со значением №1 = FQDN сервера, значением №2 = имя публикации в Интернет. В данном примере, у меня, имена одинаковые, поэтому повторять нет смысла.
    cert4.png
  6. На вкладке General вписать Friendly Name "Web Apps", чтобы потом не думать, что за сертификат.
  7. На вкладке Privat Key - Key options выбрать опцию Make this key exportable.
    cert6.png
  8. Выбираем путь сохранения шаблона
    cert7.png
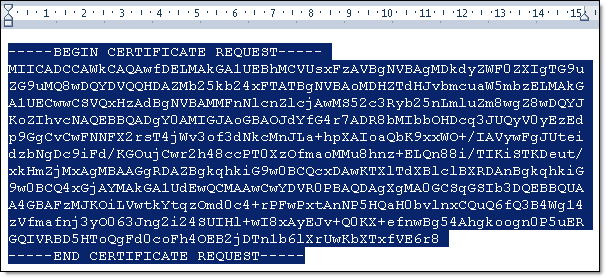
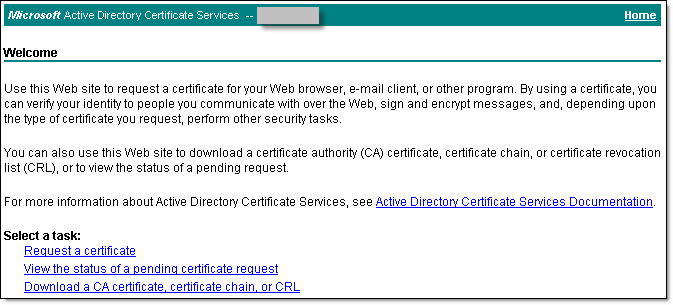
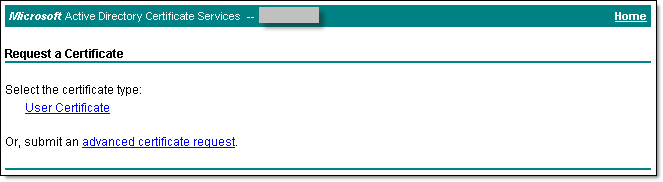
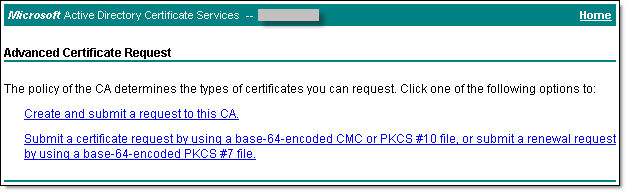
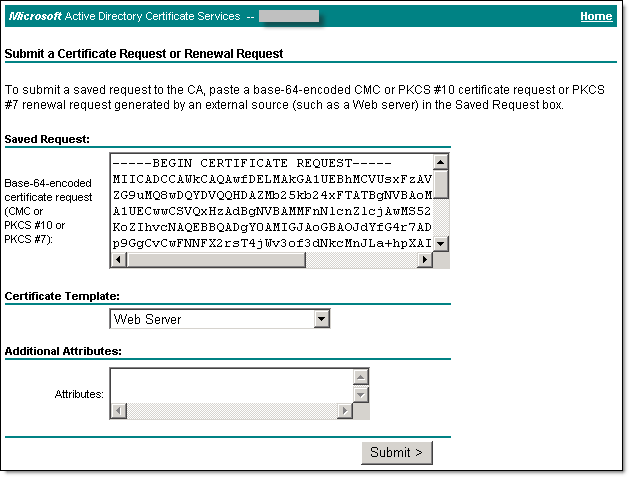
  9. Заходим на web-форму Центра Сертификации, где выбираем создание сертификата по запросу Base-64-encoded certificate request, шаблон Web Server, вставляем содержимое запроса в форму.
    cert8.png
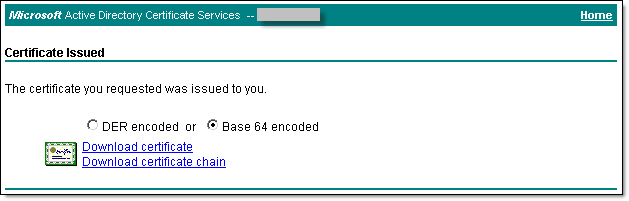
  10. Сохраняем сертификат на сервере.
  11. В консоли mmc на Certificates - Personal правой клавишей выбрать действие - Все задачи - Импорт
    cert9.png
Настройка OWAS проводится из PowerShell, который необходимо запустить с правами администратора.
Загрузить модуль OWAS:
Import-Module OfficeWebApps

Запустить команду настройки фермы OWAS:
New-OfficeWebAppsFarm -InternalUrl "https://wa01.domain.local" -ExternalUrl "https://wa01.domain.local" -CertificateName "Web Apps" -EditingEnabled

и согласиться на изменения.

config1.png

В браузере зайти по адресу https://wa01.domain.local/hosting/discovery и увидеть xml-файл конфигурации сервера

Далее переходим на сервер Sharepoint

запустим SharePoint Management Shell выполним:
New-SPWOPIBinding -ServerName wa.lab.mars.ua
Убедимся что мы используем https:
Get-SPWOPIZone
Если наш сервис доступен только внутри сети включим использование internal-https:
Set-SPWOPIZone –zone “internal-https”
А если доступен “снаружи” то включим external-https:
Set-SPWOPIZone –zone “external-https”

http://www.unix.ck.ua/content/office-web-application-server-ustanovka-nastroika-sertifikatsiya
https://www.it-community.in.ua/2013/02/ustanovka-i-nastroyka-office-web-apps-v-sharepoint-2013.html/

четверг, 13 октября 2016 г.

Сертификат с DNS алиасами и загрузка его в IIS

Сначала создаем сертификат по мануалу

HOW TO: Create server certificate and include DNS alias


By default certificates are tied to the exact server name they are created for. Which is normally the FQDN of the server. If you create a certificate for the server myserver.vstrong.info and then connect to it by the short name myserver / MyServer or by any other DNS aliases, the certificate will not be seen as a trusted certificate. There is a way to get all aliases included in the certificate.
In order to create a certificate you need an application that can generate certificate request and then send it to the Certification Authority (CA) for signing.
One of the easiest application that can gererate certificate request is OpenSSL. Download and install OpenSSL from this link http://slproweb.com/products/Win32OpenSSL.html
I will be installing OpenSSL on 64-bit OS, so lets download Win64 OpenSSL v1.0.1e Light and its pre-requisite Microsoft Visual C++ 2008 Redistributible (x64).
Installation is straightforward, accept the defaults and select Copy OpenSSL DLLs to The OpenSSL binaries (/bin) directory. Please donate generously!
By default, OpenSSL looks for a configuration file in the user’s local profile directory:
1
2
3
C:OpenSSL-Win64bin>openssl
WARNING: can't open config file: /usr/local/ssl/openssl.cnf
OpenSSL> exit
Run the following SET command to specify the configuration file:
1
SET OPENSSL_CONF=C:OpenSSL-Win64binopenssl.cfg
Before we create any certificates, lets make a backup of the default OpenSSL configuration file and pre-configure default information that will be applicable to all certificates that we are going to create:
1
2
3
4
5
6
7
8
9
10
11
12
13
14
15
[ req_distinguished_name ]
countryName         = Country Name (2 letter code)
countryName_default = UK
stateOrProvinceName         = State or Province Name (full name)
stateOrProvinceName_default = Greater London
localityName         = Locality Name (eg, city)
localityName_default = London
0.organizationName         = Organization Name (eg, company)
0.organizationName_default = vStrong.info
organizationalUnitName         = Organizational Unit Name (eg, section)
organizationalUnitName_default = IT
By default, OpenSSL create 1024 bit certificate request. You you need stronger certificate, you can do either of these:
  1. Edit openssl.cfg and amend the following line:
    1
    2
    [ req ]
    default_bits        = 1024
  2. Add this command when you run openssl:
    1
    -newkey rsa:4096
What about the aliases?
Find the [ req ] section and add/un-comment the following line:
1
req_extensions = v3_req
Find the [ v3_req ] section and add a new subjectAltName line and list all DNS aliases as in this example:
1
subjectAltName = "DNS:server001.vstrong.info, DNS:server001, DNS:SERVER001.VSTRONG.INFO, DNS:SERVER001, DNS:CITRIX, DNS:citrix, DNS:10.10.100.150"
As you can see, I added lower- and uppercase, short and FQDN server name, two aliases, ‘CITRIX’ and ‘citrix’. You can also add an IP address of the server or device. I find it quite useful as sometimes IP address is easier to remember.

Lets generate the certificate request!

Open Windows Command Prompt, navigate to the the directory where you installed OpenSSL and run the following:
1
openssl req -new -nodes -keyout server001.key -out server001.csr
There will be a series of questions. Answer each question and make note of the challenge password; it will be needed later in the process.
The certificate creation process will create 2 files:
  1. *.crt – the CSR that will be signed by the Certificate Authority to create the final certificate
  2. *.key – the private key in PEM format
Create certificate request - 1
1
2
3
4
5
6
7
8
9
10
11
12
13
14
15
16
17
18
19
20
21
22
23
24
25
26
27
28
C:OpenSSL-Win64bin>openssl req -new -nodes -keyout server001.key -out server001.csr
Loading 'screen' into random state - done
Generating a 1024 bit RSA private key
..................++++++
......++++++
writing new private key to 'server001.key'
-----
You are about to be asked to enter information that will be incorporated
into your certificate request.
What you are about to enter is what is called a Distinguished Name or a DN.
There are quite a few fields but you can leave some blank
For some fields there will be a default value,
If you enter '.', the field will be left blank.
-----
Country Name (2 letter code) [UK]:
State or Province Name (full name) [Greater London]:
Locality Name (eg, city) [London]:
Organization Name (eg, company) [vStrong.info]:
Organizational Unit Name (eg, section) [IT]:
Common Name (e.g. server FQDN or YOUR name) []:server001.vstrong.info
Email Address []:
Please enter the following 'extra' attributes
to be sent with your certificate request
A challenge password []:MySuperSecretPassw0rd
string is too long, it needs to be less than  20 bytes long
A challenge password []:MySuperPWD
An optional company name []:

Signing the request

You must sign the request with Microsoft Active Directory Certificate Services.
  1. Open server001.csr with Wordpad (to preserve the formatting) and copy the contents onto the clipboard (Edit > Select all; Edit > Copy).
    Create certificate request - 2
  2. In Internet Explorer, navigate to the Microsoft CA server.
    Enter the following URL:
    http://<CA_server_IP_address>/certsrv
    The Certificate Services applet starts.
  3. On the Welcome screen, below the Select a task heading, select Request a certificate.
    Create certificate request - 3
  4. The Request a certificate page displays. Select advanced certificate request
    Create certificate request - 35
  5. On the Advanced Certificate Request screen, select Submit a certificate request by using a base-64-encoded CMC.Create certificate request - 4
    The Submit a Certificate Request or Renewal Request screen displays.
  6. On the Submit a Certificate Request or Renewal Request screen, paste the content of the server001.csr file (previously placed on the clipboard), in the Certificate Template drop down window select Web Server or other appropriate to your needs template and click Submit.
    Create certificate request - 5
  7. The certificate is issued and the Certificate Issued screen displays.
    Create certificate request - 6
  8. Select the Base 64 encoded radio button and then select Download certificate. Save the certificate as server001.cer to your desktop.
  9. Lets confirm the certificate includes the server aliases:
    Create certificate request - 7

Далее генерим .PFX для загрузки в IIS


c:\OpenSSL-Win64\bin>openssl pkcs12 -export -out certificate.pfx -inkey server001.key -in server001.cer
Enter Export Password:
Verifying - Enter Export Password:


c:\OpenSSL-Win64\bin>

Далее в Диспетчере служб IIS в разделе Сертификаты сервера импортируем certificate.pfx

После чего уже в Привязки сайта назначаем импортированные сертификат на https

Рестартуем IIS. Готово!


http://vstrong.info/2013/03/19/how-to-create-server-certificate-and-include-dns-alias/